1999-2009 [Subscribe to Daily Digest] |

 [Profile/Gallery]
, Sun, 29 Sep 2013 13:47:48
Members do not see ads below this line. - Help Keep This Site Online - Signup
[Profile/Gallery]
, Sun, 29 Sep 2013 13:47:48
Members do not see ads below this line. - Help Keep This Site Online - Signup
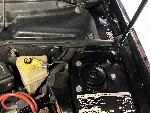
Before answering ..in my defense first let me say.. this is 2003 aero with the 159K..the original subframe rear bushing were totally shot..anything in their place would be better...driving the car the next day;
a.) The creak I get when turning into the driveway...gone.
b.) The vibration at stop lights that felt like the motor hitting the frame..gone
c.) The transmission kick in stop and go traffic ...gone.
d.) Definitely a bit tighter on curves..
e.) I have not done the front rear control arm bushing yet..that should help even more?
Ok.. so the infamous Rosebush tool I had used in the past to do the rear
suspension...mainly the rear cross-stays; it was made for them. One thinks the tool is useless after that but perhaps the front suspension is from Vauxhall also ?
For this job gumption and lack of funds were key;
1.) Jacked up the front of the car as much as I could with jack on the front and jack stands on each wheel jack point...added pieces of wood to the front jack, raised jack stands...repeat..
b.) I basically took both rear subframe bolts out. (Did one side first). The bracket things in the back are independent on each side. Loosened the middle subframe bolts (ones but the struts) all the way. And I even loosend the front two bolts of the subframe a little. I kept my jack on one side of the subframe but truth be told with no jack at all the frame did not come down much at all. I kept two more jack stack an inch below for safety but it essentially does not come down very much.
c.)I had about 3/4 inch to work between the top of the rear bushing and car. 1.2 inches if I used a pry bar to pull the frame down some more. Less on the drivers side. Not even enough to slide the Propart bushing on top of the subframe (they must be inserted from the top).
d.) I had hard time getting first shot bushing out but learned a bit to make the second faster. The Rosebush tool as a threaded bar, 2 nuts, a wider washer, and a big receiving cup. The big cup fits exactly in the hole in the bottom of the subframe around the bushing sleeve. The washer fits exactly through the top bushing hole! Screwing the tool from the bottom pushes the old bushing sleeve down into the cup. I actually used it first with no washer to push the middle of the old bushing out. I did try my dremel to cut the bushing and sleeve out at first but tried this tool and the exact fit made me laugh.
e.) With the old bushing out, subframe down as much as I could do, I did not have enough room to slide the new one part poly bushing in the top of the subframe and down into the subframe hole. Again, since anything was better than what was in there..I cheated..I cut the new poly bushing in half exactly in the middle with a hack saw. Placed the top half in subframe hole, bottom half in the bottom of the hole, bushing cylinder with grease into the bushing. (I had read some people obtained two part bushings somewhere on another saab board).
f.) Bolted each in a bit and then started tightening all subframe around
raising one side with my jack and tightening..much like one rotates tightening wheel bolts.
g.) Lowering the car was the reverse of raising it..did it in stages.
Note: (obviously) I could lower it enough to do the middle bushings..they did not look anything like the rear though.
I'm not advocating this cheater-hack method for anyone..but it's better empty air I had there before.
posted by 170.146.22...
, Sun, 29 Sep 2013 13:47:48, Mon, 30 Sep 2013 08:09:01
No Site Registration is Required to Post - Site Membership is optional (Member Features List), but helps to keep the site online
for all Saabers. If the site helps you, please consider helping the site by becoming a member.
 |
 |
 |
 |
 |