
1985-1998 [Subscribe to Daily Digest] |
 | [Main 9000 Bulletin Board | BBFAQ |
Prev by Date | Post Followup ]
Member Login / Signup - Members see fewer ads. - Latest Member Gallery Photos
Tips for Control Arm Bushing Replacement Posted by Porschephile951 [Email]  (#2169) [Profile/Gallery]
(more from Porschephile951) on Wed, 23 Jan 2008 10:02:20 (#2169) [Profile/Gallery]
(more from Porschephile951) on Wed, 23 Jan 2008 10:02:20
 Members do not see ads below this line. - Help Keep This Site Online - Signup
|
Here are some DIY ideas that could help anyone refreshing the bushings in the front end of the 9000 from any model year.
I performed this procedure on this particular car a few months ago, however I've done it on all five 9000s I've owned so I've refined the techniques somewhat over time. I posted these photos within a thread before, but I'd like it to be easily search-able.
FRONT CONTROL ARM BUSHINGS
Probably the most difficult part of the project is removing and installing the front control arm bushings, as they're pressed in there and don't have very much end surface area in which to set up a tool. Many people take them to get pressed or buy rebuilt control arms...here is how I did it.
http://i139.photobucket.com/albums/q292/swagger93/7-25-079000sus010.jpg
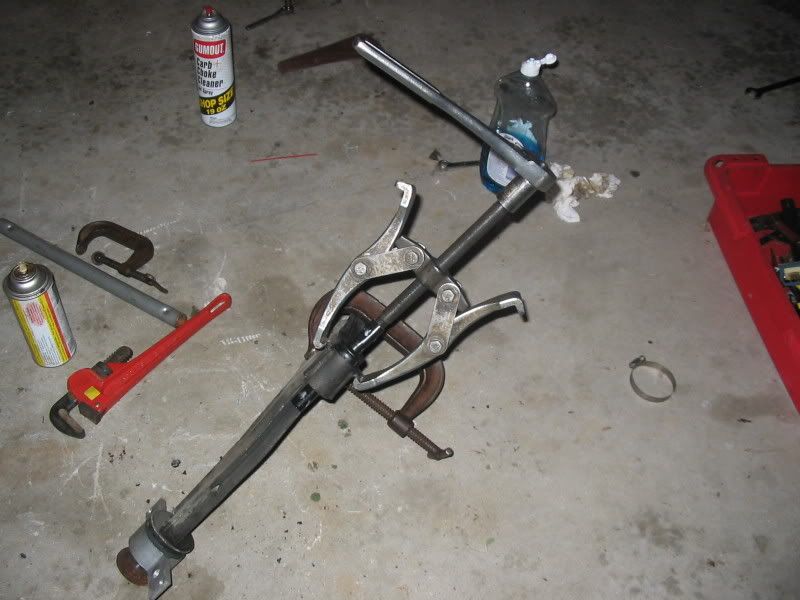
You need:
*Two-legged puller
*Large "C" clamp
*Dish soap
*Punch or drill (optional)
Removal: Use the "c" clamp as a stand on the bottom part of the arm so you can get a good angle on it; I found it more flexible than a vice. Use a punch or drill to make a shallow point to line up the puller. Grip the puller legs on the two flared edges of the bushing housing (it's a nice idea to sharpen the edges of the puller if they're really worn) and push the old bushing out.
Installation: The "c" clamp still in place, use the dish soap to lubricate the inside of the bushing housing and outer leading lip of the bushing. Honestly I have a steady enough hand that I found I didn't need to use a punch or drill for removal or install to keep the puller aligned, but if you do on the new bushing be cautious, the metal isn't as robust as you'd expect. Line up the puller as with removal and slowly (you can't really go fast with a puller anyhow) push the new bushing in. If it is somewhat off line ( <30deg or so) initially I found it OK, as it corrects itself as you press it in further. Orient the bushing before final installation with a vice grips. Remember that the arm will be oriented toward the ground so set the bushing as such:
http://i139.photobucket.com/albums/q292/swagger93/7-25-079000sus014.jpg
***Do not use WD-40 or grease to lubricate the bushing housing or bushing. I've found on other cars it to cause horrid squeaking. I suppose silicone-based spray might be safe, but the dish soap is a sure bet.
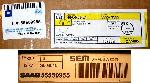
IMPORTANT! When ordering your parts remember to get these little dohickeys; they're aluminum caps that appear to shim the bushing...they always disintegrate. Personally I used a micrometer to determine the shim width and used washers instead.
Pic:
http://i139.photobucket.com/albums/q292/swagger93/7-25-079000sus001.jpg
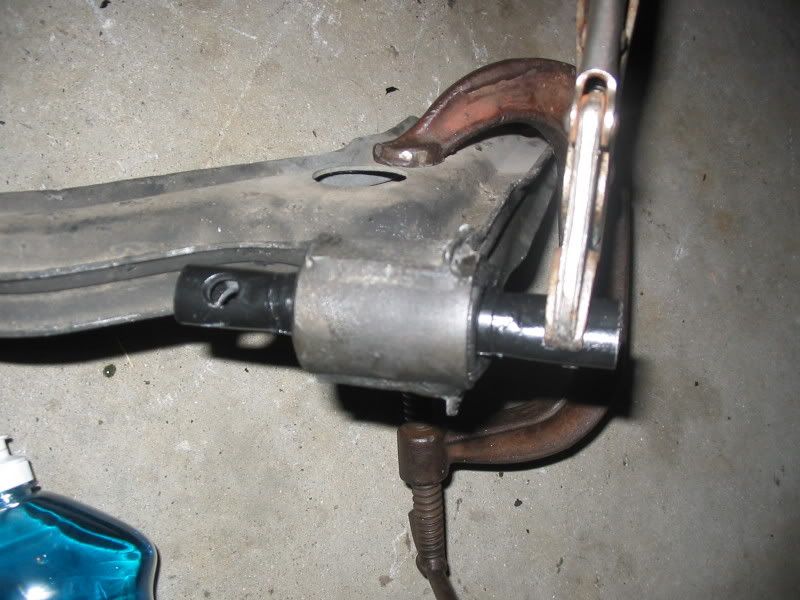
REAR CONTROL ARM BUSHINGS
You will often times find the sleeve within the old, rotted bushing to be frozen to the shaft on the end of the control arm. If the new bushing won't fit on it's because the old sleeve was left behind. It can be real frozen sometimes, and you don't have a place to snag a puller or press.
You need:
*Pipe wrench
*Ample arm strength
http://i139.photobucket.com/albums/q292/swagger93/7-25-079000sus016.jpg
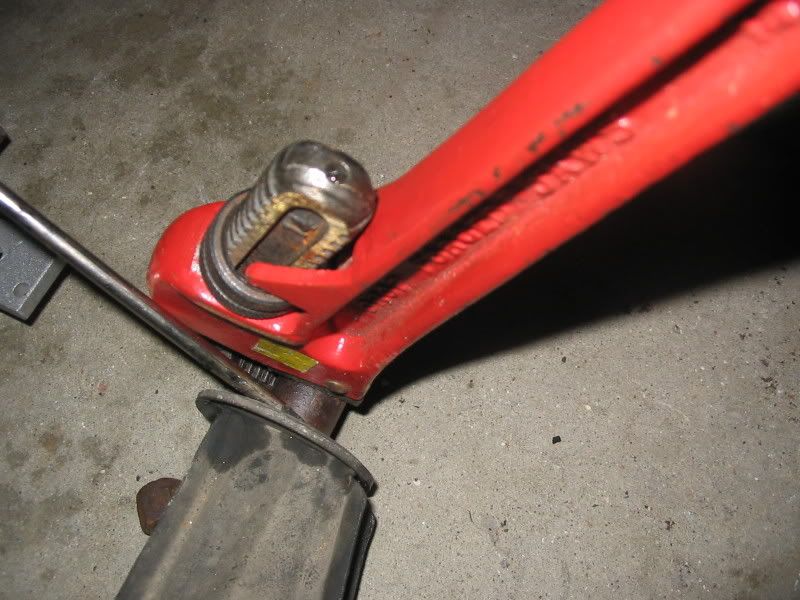
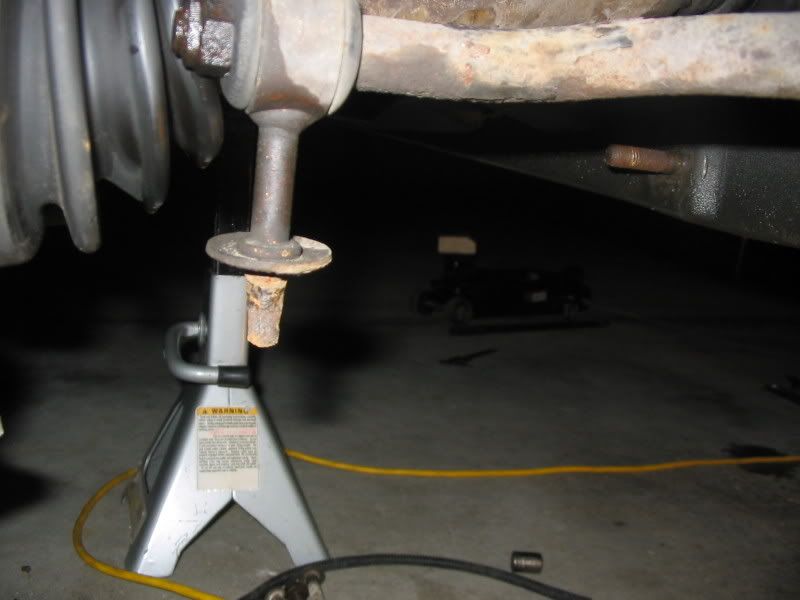
Removal: I just stepped on the control arm and got a good bite from the pipe wrench. Just twist to loosen while applying some lateral force to walk the sleeve off the shaft. The arm strength required is probably directly proportional to factors like age of the car and corrosiveness of its environment :-). Once you get twisting it usually comes off nicely.
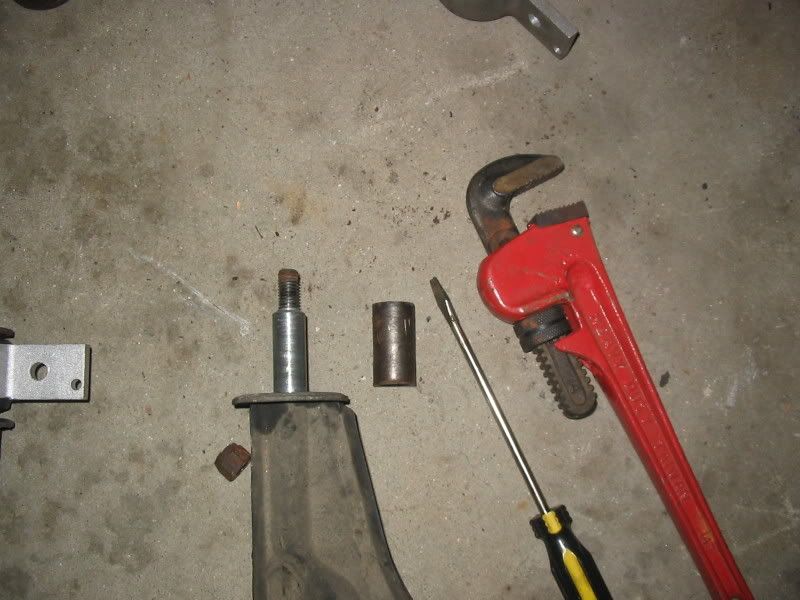
http://i139.photobucket.com/albums/q292/swagger93/7-25-079000sus017.jpg
http://i139.photobucket.com/albums/q292/swagger93/7-25-079000sus018.jpg
BUY SWAYBAR END LINKS ALONG WITH THE BUSHINGS
http://i139.photobucket.com/albums/q292/swagger93/7-25-079000sus021.jpg
If your car needs bushings, chances are it has corrosion all over the swaybar links, which must be unbolted from the control arm and are weak sauce if you ask me. I've broken probably 75% of them despite copious amounts of PB Blaster. You stand a lot better chance with an impact gun, but you'll probably still bend or fatigue the rusted part. You think your 9000 rolls a lot now? Wait until you have to drive it around while your swaybar links are on order. If you are fortunate enough to own an electric impact gun the swaybar to link nut comes off nicely, as they usually require tons of torque to remove...a breaker bar could distort the swaybar, incorrectly preloading and thus throwing off the geometry of the front end. Bent end links will do this too.
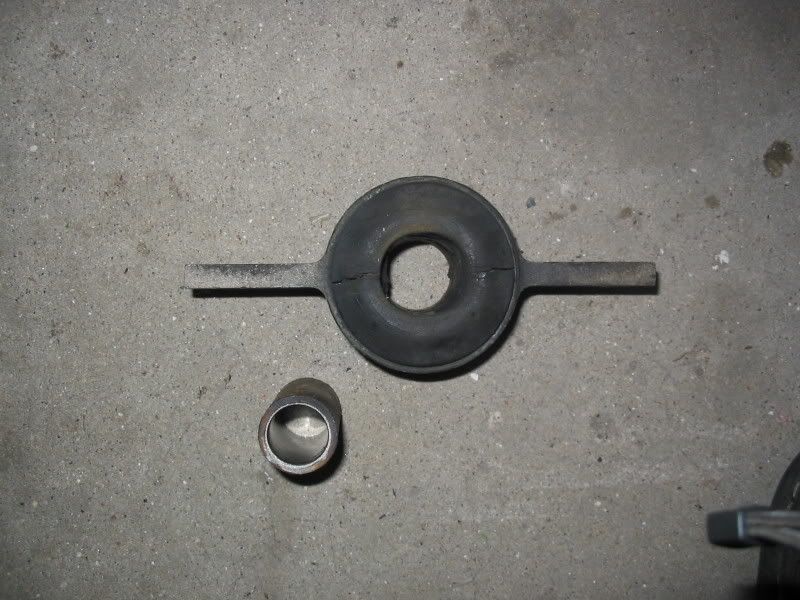
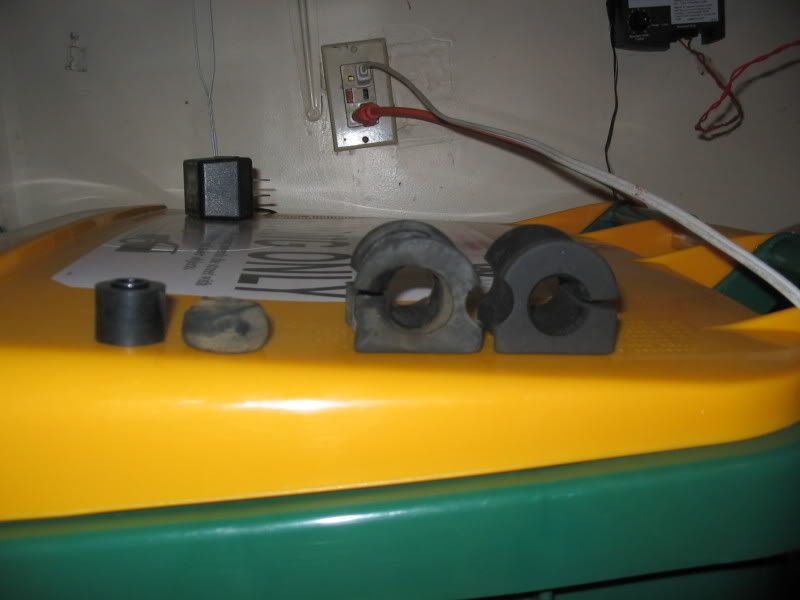
New swaybar vs. old swaybar bushings:
http://i139.photobucket.com/albums/q292/swagger93/7-25-079000sus025.jpg
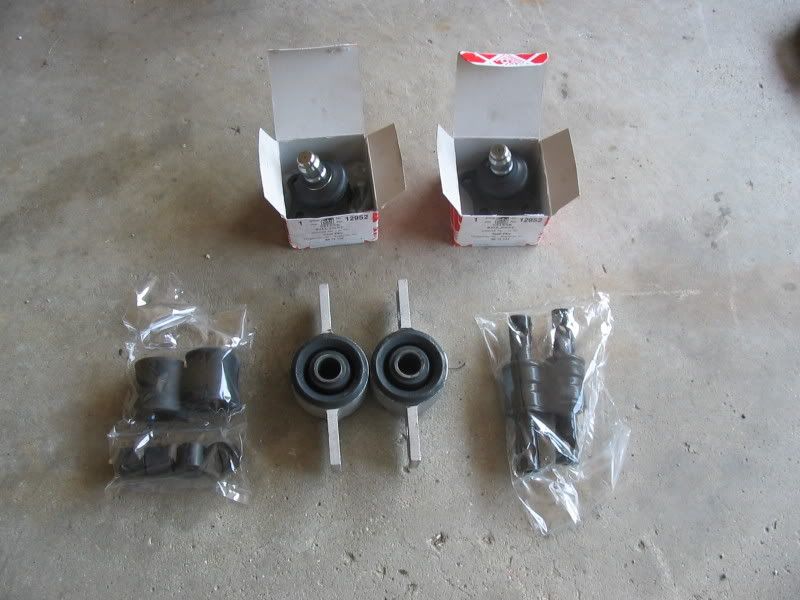
All new parts:
http://i139.photobucket.com/albums/q292/swagger93/7-25-079000sus009.jpg
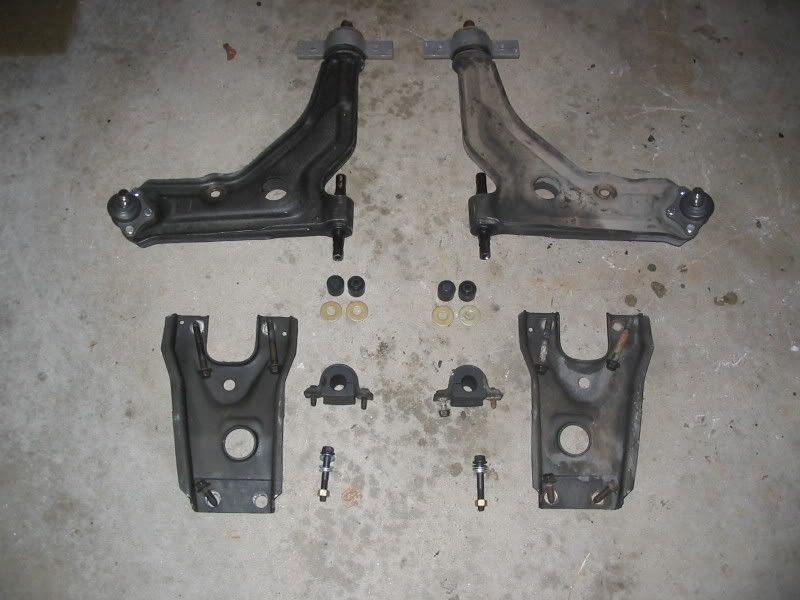
Ready to install:
http://i139.photobucket.com/albums/q292/swagger93/7-25-079000sus029.jpg
Hope this was of service,
Evan
1995 Saab 9000CSE 5sp 300ft/lbs tq
1986 Porsche 951
posted by 65.30.156...
, Wed, 23 Jan 2008 10:02:20 <-- Viewing This Message , Wed, 23 Jan 2008 11:42:41, Wed, 23 Jan 2008 14:12:52, Thu, 24 Jan 2008 11:30:23, Sat, 26 Jan 2008 08:54:23
No Site Registration is Required to Post - Site Membership is optional (Member Features List), but helps to keep the site online
for all Saabers. If the site helps you, please consider helping the site by becoming a member.
 |
 |
 |
 |
 |
