1994-2002 [Subscribe to Daily Digest] |
 Members do not see ads below this line. - Help Keep This Site Online - Signup
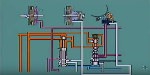
Front brakes: install new pads and rotors
drs_install <-- search keyword
Subject Vehicle: 95SET, Manual, 130000 miles
Condition of old brakes:
The rotors were original, even wear, no scoring, no scaling, excellent wear surface condiion. The pads were original and had 40% of the pad thickness remaining.
Reason for work: Vehicle is 6.5 years old and is getting a mid life refit. Rear pads calipers and rotors are on hand and will soon be installed, and brakes bled etc.
Tools: General tools are all that are needed. A 'water pump' slip joint wrench is good to have. You will need a 10mm hex drive bit, and an adapter if needed, to work with a 1/2" breaker bar, socket driver and torque wrench. Some anti sieze, brake grease and pentrating rust preventative should be used. Get a sturdy wire coat hanger to cut up.
Approach: I have been wondering about removing the whole caliper assembly via the 10mm cap bolts and not touching the guide bolts that hold the slider and caliper together. It turns out that is works quite well!
1) Remove any hub caps and loosen the wheel bolts a bit.
2) Jack up one or both front corners. I use two floor jacks.
3) Remove the wire springs on the outboard side of the caliper that puts tension on the sliding mechanism. Note how it goes on and fits behind projections etc.
4) Cut up the wire hanger to allow for suspending the caliper to not have its weight on the rubber brake line.
5) 5mm hex key. Remove the special bolt at holds the disc to the rotor. Clean out rust and dirt from the hex recess. It might be tight. It is not a very hard material so be very careful not to strip it. Use penetraiting oil if it does not come out readily. Some hammer blows might help free it up as well. If the 5mm recess in the bolt seems to be deforming, remove the allen key and peen the recess in slightly. A small ball peen hammer would be good. Now drive the key into the slightly collapsed recess to reestablish the fit and try again. (If you are not needed to do a brake job, I suggest you oil or loosen this fastener to avoid future problems!) If the rotor needs to be held to resist the torque of the allen key, a large screw driver inserted into the vent holes at the edge of the disc will work well.
6) Use the slip joint wrench to press the inboard pad back to press the caliper piston back into the caliper. As you do this you might want to watch that the brake fluid reservoir does not overflow. You want to do this now while the caliper is bolted to the hub, unless you have three arms to do this when it is loose!
7) Turn the steering wheel to enable access to the two 10mm cap bolts at the back which fasten the caliper assy to the hub. Use a 1/2 breaker bar to get the bolts started. Be sure to clean out dirt and rust which may prevent the 10mm hex bit from seating properly in the cap bolt. These bolts have loctite on them and will not come out easily. So you will want to use a racket wrench to back them out. Note the sheet metal piece that goes under the bolts.
8) Remove the caliper from the hub and place on the wire hanger while keeping an eye on the brake hose.
9) Remove the old rotor, degrease the wear surfaces of the new rotors and place on the hub. Coat the special 5mm screw with anti sieze on the threads and bolt head contact surfaces and tigten up, but do not tighen too much or it might not come free next time!
10) My outboard brake pads were glued backside to the caliper assy. This was obviously done so that the pads would not be flopping around on the assembly line. If the pad will not simply come out, a good hammer blow will free it up. (While the spring is in place, I cannot see the point of that glue, as the spring force seems to secure the pad quite well.) The pads are easily removed and replaced with the caliper assembly removed via the 10mm hex cap bolts. I cannot see that I would ever want to disturb the guide bolts to do replace pads. The inboard pad has spring fingers which secure it into the recess of the caliper pistion. So you have to pull it free of the piston then remove it.
11) Put in the new pads. I put some anti sieze on the back of the outboard pad were it makes contact, and also coated the backing plate 'ears' and the contact and sliding points on the caliper assy. This acts as a lubricant and keeps water out. You could use brake componet grease as well. Some lub on the inboard pad spring fingers might allow for an easier fit into the cavity of the piston.
12) Put the caliper in place and put in the two 10mm head cap bolts though the small sheet metal piece. Tighen to 78 ft-lb for 1994-1996 production and 81 ft-lb for later years.
13) Fit the tension spring removed in step #3. Make up a wire hook to fit on one leg of the spring to pull in into place. It is not as easy as you might expect. As you get it over the tapered hole in the caliper, use a hammer to drive it into the hole. If you do one side at a time you can always look at the other if in doubt about about how it goes.
13) Press the brake petal with 1/2 strokes to take up the slack in the caliper! If you don't do this between doing each side, having both pistons pressed fully back at the same time simply increases the possibilty of reservoir overflow. If you don't do this and drive off, the brakes will be dead when you step on the brake petal.
14) Mount the road wheel and tighten the bolts firmly, lower the vehicle and tighten the wheel bolts with a torque wrench. Hub caps?
Other steps:
I replaced the 6 #40 torx screws that secure the splash shields to the hubs. These were in rough shape from rust and from the Koni shock install. I bedded these down in anti sieze and sprayed the heads and hex recesses with penetrating rust preventive. I also put rust preventive on the front and back of the brake shield and into the contact interface with the hub. The 10mm hex cap bolt heads and recesses were also treated after assembly. The caliper to hub interface was treated after assembly and torque. Other things were sprayed as well that were accessable while the work was being performed. (I spent hours treating fasteners and other things when the vehicle was new in 1995.)
Time duration: The work described as above, plus the brake shield fasteners etc, 2 hours inclusive of putting tools away, sweeping up brake dust etc, washing and opening beer. Getting the old brake shield torx screws out took some time.
Note: New pads take a while to break in. Do a test drive and get to know the intial conditions of the brakes before getting into serious traffic!
Rear pads, rotors, calipers and brake bleed comming up soon.
posted by 208.24.17...
No Site Registration is Required to Post - Site Membership is optional (Member Features List), but helps to keep the site online
for all Saabers. If the site helps you, please consider helping the site by becoming a member.
 |
 |
 |
 |
 |