
The trim can be ordered from www.sportwing.com. Ask for part AB650. It comes in 50' and 150' rolls; 50' will do two SAAB's with about 3' to spare. Cost: about $45 shipped (not cheap, but you WILL like the result).
Directions:
Start with the rear window - the corners can be fussy but it's less technical overall. First, pry off the silver 2" silver cap that hides the seam, located on the bottom edge, centerline. Grab hold of the offensive old molding and gently peel it out of the rubber channel molding. Take the acetone-dampened rag and clean the dirt out of the channel so that the new molding's adhesive strip will stick.
Start the new molding exactly at the centerline. I found it easier to work counter-clockwise (i.e. from the centerline toward the right, first).
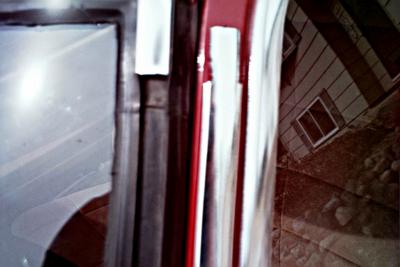
Peel 12" or so of the backing tape off the molding and seat one edge of the molding into the rubber channel. With the putty knife, pry the molding under the rubber channel's lip while pressing down on the molding with your free hand, working 1" at a time. Continue removing backing tape as needed. Do not allow short segments of rubber channel to remain tucked under the molding - get the molding fully under the channel lip. Note also that you may be causing little "nicks" or "creases" in the precious new molding with the putty knife. However, as long as you're not really hacking it up, these little defects will be completely hidden when the molding is fully seated into the rubber channel. Proceed around the window perimeter. The corners can be a little tricky because of the curved molding vs. straight putty knife edge, but you'll get it.
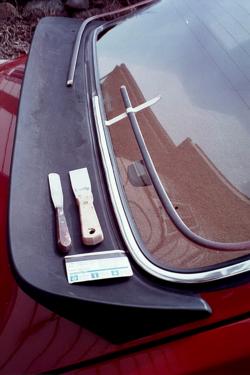
When finished, cut off the molding so only a small gap remains. Hold the silver cap piece up to the centerline gap, noting how much of the new molding is obscured when the silver cap is later installed. Also note that, because the new molding is of a different profile than the old, the silver cap will not snugly cover the gap/new molding. Using the Dremel cut-off wheel, you will cut a shoulder, making the molding narrower ONLY in the end segments that are covered by the silver cap. Carefully mark the molding such that you know where to cut, then pull just a couple inches of molding out of the channel so you can cut it with the Dremel. How much to narrow it by? Use the adhesive tape on the channel's backside as a guide; just cut up to it - that's your new desired width. When both ends are suitably trimmed down, snap in the silver cap.
The front windshield molding is similar, except that you have four corners and therefore four seams to hide with caps, as was done with the rear window. The silver cap is now in a "right-angle" shape at each corner. Otherwise, the procedure is the same. Use care when measuring how far to "narrow" the molding with the Dremel so as to not cut off too much. Note: My corner caps where a bit tarnished, so I polished them to like-new with a little metal polish.
When you are done, use the credit car to smooth out any small ripples in the rubber channel where it meets the new molding. Insert a corner of the credit card down between the chrome molding and rubber channel, and trace the entire molding, both sides, to smooth it out. Unrelated to this repair: While you're at it, has your rubber channel molding "knuckled under" at any of the four corners where it meets the car paint? This seems to happen spontaneously with age. If so, you may be able to coax it back into place by running the credit card between the rubber channel and car paint.