Re: Front swaybar bushing life? - Saab 9-5 Bulletin Board - Saabnet.com
 The banner above is an advertisment - if it asks you to download software, please ignore.
Site News -
4/9 Saab Owners' Convention Day Pass Raffle |
3/26 M Car Covers (by State of Nine)
 [General |
Members |
C900 |
9000 |
NG900 & OG93 |
93 |
95 |
NG95 |
99 |
Sonett |
Vintage Models |
Clubs |
Other Cars |
FAQs |
Gifts |
Member Photo Galleries |
Member Directory |
Classifieds |
Manuals |
*Buddy Registry |
*Mileage Registry |
Polls |
What's New |
Raffle |
Photo of the Month |
Sponsors]
[General |
Members |
C900 |
9000 |
NG900 & OG93 |
93 |
95 |
NG95 |
99 |
Sonett |
Vintage Models |
Clubs |
Other Cars |
FAQs |
Gifts |
Member Photo Galleries |
Member Directory |
Classifieds |
Manuals |
*Buddy Registry |
*Mileage Registry |
Polls |
What's New |
Raffle |
Photo of the Month |
Sponsors]
[Main 95 Bulletin Board | BBFAQ |
Prev by Date | Next by Date | Post Followup ]
Member Login / Signup - Members see fewer ads. - Latest Member Gallery Photos
Re: Front swaybar bushing life?
Posted by Señor Don [Email] (more from Señor Don) on Mon, 18 Nov 2013 19:43:34

In Reply to: Front swaybar bushing life?, steve, Mon, 18 Nov 2013 18:34:06
Members do not see ads below this line. - Help Keep This Site Online - Signup
Sway bar bushings are far easier tom replace with the subframe dropped.
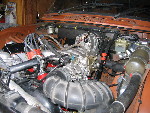
I just finished removing and replacing all six subframe bushings with polys from ProParts via Fleabay. I already had the power train out (from the top) with jack stands iunder the front jacking points. I used my engine crane with a chain to raise the jack stands even higher and ground a 17mm open end wrench to fit the stabilizer link notches behind their attaching nuts. Detaching the three nuts under each ball joint was easier than aligning and refitting the taper pin bolt. Exhaust is easily moved after detaching the clips. The rear engine mount straddles the steering rack and must be detached from the subframe. The removed steering rack bolts and nuts were useful to punch the worn rubber bushings up from the detached subframe, and later enabled the newly installed poly bushings to be wiggled into their final positions. I made my own bushing tool. 3/4" rod 12" long, two 3/4" nuts, two heavy duty 3/4" flat washers, 1-1/16, 3/4," drive socket, 1-1/8", 3/4" drive socket, 2-1/4" 3/4" drive socket. The smaller sockets were placed on top and the largest on the bottom to press out the old bushing sleeves into. Turning the nut under the bottom washer and socket while holding the rod at the top from moving allowed the top nut and washer to press either the socket against the sleeve, or the poly bushing downward. A bit of effort to accomplish, but Voila! Vivre le difference!!
Happy SAABing!
posted by 69.247.253...
Posts in this Thread:
Members do not see ads below this line. - Help Keep This Site Online - Signup
Post a Followup
No Site Registration is Required to Post - Site Membership is optional (Member Features List), but helps to keep the site online
for all Saabers. If the site helps you, please consider helping the site by becoming a member.
StateOfNine.com
 |
SaabClub.com
 |
Jak Stoll Performance
 |
M Car Covers
 |
Ad Available
 |

Random Saabnet.com Member Gallery Photos (Click Image)
This is a moderated bulletin board - Posting is a privilege, not a right.
Unsolicited commercial postings are not allowed (no spam). Please, no For Sale or Wanted postings, SERIOUSLY.
Classifieds are to be listed in The Saab Network Classifieds pages.
This is a problem solving forum for over 250,000 Saab owners, so expect to see
problems discussed here even though our cars are generally very reliable. This is not an anything goes
type of forum. Saabnet.com has been a moderated forum since 1988. For usage guidelines, see the
Saabnet.com Mission and Purpose Page. Please remember that you are
not anonymous. Site Contact | Site Donations | Other Sites by SP -
Poverty2Prosperity.org | Run Club Menlo Park | ScreenBot
Site Members do not see red text instructions, bottom of the page anchor ads, or box ads.
Click here to see all
the Site Membership Benefits!