1979-1993 & 94 Conv [Subscribe to Daily Digest] |
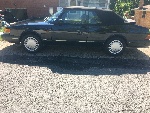
I recently completed installing a 1994 900 Turbo convertible alarm system in my '91 SPG.
The '91 was NOT prewired for it (I had been told yes, and no.....) but overall, the job was fairly straight forward, requiring several donor parts, and several lengths of new wiring. These instructions should work for any car with central locks, but do make note, my main intent was to get SAAB-issued keyless entry in my car. Whether the alarm was fully functional was not a priority for me. The instructions are specific to a 1991 hatchback, but looking at the Bentley manual, installation would be VERY similar on cars dating back to 1985, pending a few wire color changes.
1) Remove the alarm brain setup from under the rear seat. It is a bracket, held to the crossmember with 2 screws. Take the whole bracket, everything attached to it, and cut as much wiring as you can in the process. There are a 10-pin, 8-pin and 2 pin connection to the whole bracket apparatus. Keep those plugs in tact, and cut the donor cars harness a few inches past the plug, leaving you a pigtail to solder to. This isn't 100% necessary, but I wanted to be able to unplug the whole alarm setup if need be. There will also be a "headphone jack" looking plug in the alarm brain with a black wire. This goes to the glass break sensor on the steering column. I unplugged it and left it. It is not part of my new setup. Also remove the dash LED with wiring, and the console power lock switch, with as much wiring as you can get.
2) Under the hood, remove the pin-switch mounted to the radiator support on the passengers side, and the alarm siren mounted down behind the passengers headlight.
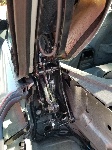
3) Remove the center console and knee bolster from your car. Locate the central lock relay pack on top of the air duct going to the passengers footwell. Unplug the connection, remove the relay pack, remove the bracket which held the relay pack to the duct. Using a small flathead screwdriver remove all 6 of the electrical connections from the plastic housing. Insert the screwdriver from the plug-side on the top, then bottom of the connector, then give a tug on the wire. It should pull out. Leave all 6 wires hanging. We'll get to that later. (NOTE: On the black plastic plug, you can see the pin numbers molded into the plug).
4) Remove drivers door panel, and remove the power lock actuator. It has 3 wires. Replace the actuator with one removed from the donor cars drivers door. It has 2 wires. The 3 wire actuator is simply a switch that sends a lock/unlock signal to the central lock relay pack, which in turn activates the actuator at the passengers door and rear hatch. The 3 wire actuator is NOT a motor, and is incapable of physically moving the lock linkage. You need the 2 wire actuator from the donor car. Install it. For wiring, remove the 2 wires on the actuator by releasing a tab on the plug, and plug them into the 3-wire receptacle in the door harness as shown on the Twinsaabs site (FixMySaab.com --> C900 -> Interior -> Adding keyless entry).
WIRING IT ALL UP
There are 4 plugs that need to be addressed. An 8-pin plug on the central lock relay pack which is mounted to the bracket you removed, a 2-pin plug with large yellow/red wires, then an 8-pin and 10-pin plug which the cars harness tied into.
1) For the 2-pin harness I simply left it unplugged. This is an alarm-driven starter solenoid cutoff which one of the 2 cube relays does. I didn't want bother with this function. Leave it alone. If you want this function you are on your own to figure it out.
2) On the alarm brain assembly, there is a central lock relay pack controller mounted to the aluminum bracket (black rectangular piece). Unplug the 8 wire connector, and in the same manner as above, use a small flathead screwdriver to remove pins 7 (VIOLET) and 8 (BROWN/WHITE). Cut them off, tape them up....what have you. They are not needed. Locate the 6 dangling wires that USED TO go to your original central lock relay pack which you removed earlier. Take the YELLOW, and splice it into the BROWN/WHITE. Take the GREEN/WHITE, and splice it to the VIOLET. There will now be 3 wires spliced together. One goes to the passengers door lock actuator. One goes to the rear hatch lock actuator, and the green/white & yellow you spliced in, will now trigger the 2-wire drivers door lock actuator. Take these newly spliced VOILET and BROWN/WHITE wires, and plug them into holes 7 and 8 on the central lock relay pack plug. Look at the physical electrical plug before insertion and you will see 2 little metal tabs. You flattened them to allow the pins to be removed. Prop them back upward with the screwdriver so they will catch when inserted into the plastic plug. The alarm tells the relay pack to lock/unlock, and the relay pack now triggers your actuators through the cars original harness. At this point you should still have a green (constant power), and black (ground) wire hanging from the original 6 dangling wires.
3) Onto the 8-pin connector that was originally tied into the donor cars harness........
Pin 1 = Blue -> Splice to the green dangling wire that went to your original central lock relay.
Pin 2 = Black-> Splice to the Black (GND) dangling wire that went to your original central lock relay.
Pin 3 = Blue-> Run new wire to drivers speaker, tie to Blue LED wire.
Pin 4 = Yellow->Run under the hood to passengers headlight location for siren.
Pin 5 = Red-> Run a wire from here to an ignition-switched power location.
Pin 6 = Brown->Run under the hood to passengers headlight location for siren.
Pin 7 = Violet-> Run new wire to drivers speaker, tie to Voilet LED wire.
Pin 8 = Gray-> Runs to an interior time-delay relay under the back seat for turning on interior lights.
4) Onto the 10-pin connector that was originally tied into the donor cars harness......
Pin 1 = Blue/White - Run wire to the back of the directional switch plug; splice to Blue/White there.
Pin 2 = Red/White - Run wire to the back of the directional switch plug; splice to Red/White there.
Pin 3 = Violet - Not used...you took care of this with pin 7 and on the lock relay.
Pin 4 = Brown/White - Not used...you took care of this with pin 8 and on the lock relay.
Pin 5 = Yellow - Run up under the center console to the rear ashtray area.
Pin 6 = Green - Run up under the center console to the rear ashtray area.
Pin 7 = Black - Run up under the center console to the rear ashtray area.
Pin 8 = Gray/White - Not used; is for a rear seat alarm switch.
Pin 9 = Black/White - Not used; is for an alarm service switch under pass. seat.
Pin 10 = Red/White - Not used; is for an alarm service switch under pass. seat.
DOOR LOCK SWITCH - Make a squre hole in the top of the center console by the rear ashtray for mounting the switch. Splice the 3 wires you ran back there to the pigtail of the plug you removed from the donor car. The donor plug has 5 wires. 3 tie to the alarm, 1 is ground, 1 is illumination of the switch.
LED - Wire up the LED accordingly; polarity of the wires DOES matter, so keep blue to blue, voilet to violet, and install the LED in your drivers side speaker by drilling a small hole and mounting using the plastic bushing on the LED (or take the whole speaker from the donor car).
SIREN - Run the brown wire from the alarm to one connection on the hood switch. From the other side of the hood switch, run one wire to a grounded location, and one wire to the BLACK wire of the siren. Run the yellow from the alarm straight to the yellow of the siren, and mount it down under the passengers headlight (I used the bolt which holds the lower headlight mounting bracket to the radiator support).
At this point, your alarm should be powered, the remotes should work, the center lock button on the console should be functional, and when the doors, and hood are closed, you will get lock actuation, a siren chirp, and flashing of the directoinals when you activate, and deactivate the alarm using the key fob.
The only car wiring that you really get into "modifying" are the 6 wires that originally went to the central locking relay. To remove the alarm in case of any issue, these 6 wires would need to be tied back to the central lock relay.
Once it is all wired up, I used several large zip-ties to secure the whole apparatus to the passengers floor air duct, where the original central lock controller was. I considered moving it all under the rear seat, but I would have had to "Extend" the 6 original wires, and run all of my new wires back to the dash area anyway, so I opted to dash-installation of the alarm.
Feel free to ask any questions, or request pics; its still fresh in my mind. This job COULD be done with just the alarm and the 2 white plug connections to the alarm, but having the SAAB car harness to follow from the Bentley manual helps tremendously.
posted by 129.33....
No Site Registration is Required to Post - Site Membership is optional (Member Features List), but helps to keep the site online
for all Saabers. If the site helps you, please consider helping the site by becoming a member.
 |
 |
 |
 |
 |


