1979-1993 & 94 Conv [Subscribe to Daily Digest] |
 | [Main C900 Bulletin Board | BBFAQ |
Prev by Date | Next by Date | Post Followup ]
Member Login / Signup - Members see fewer ads. - Latest Member Gallery Photos
Classic 900 Convertible Top Replacement (Entire Frame) Posted by Saabina [Email]  (#33) [Profile/Gallery]
(more from Saabina) on Thu, 5 Jul 2012 12:08:01 (#33) [Profile/Gallery]
(more from Saabina) on Thu, 5 Jul 2012 12:08:01
 Members do not see ads below this line. - Help Keep This Site Online - Signup
|
Given the number of Classic Saab 900 Convertibles nearing the end of their lives, you may be able to find a decent top for a few hundred dollars (or less) which can be swapped from a junker to your cherished convertible without the expense of a new top from a job shop or replacing the fabric portion yourself. Make sure the frame is not bent or damaged and the rear window section is in good shape before buying a used top as it often is the first to show signs of trouble. The window section is a separate piece so you can replace it with a new or used one from another top easy enough. They are attached with a heavy duty zipper just above the window on the inside of the top.
Here are the steps I found necessary. There may be some shortcuts like not removing the seat back but I found removing it gave me better access and more room to work.
Note: there is a hydraulic valve accessed through the trunk (lower right side seat back looking forward) which if turned will allow manually moving the top which I found helpful.
1) Remove the entire back seat (bottom and back.) The back section has 4 bolts - 2 in the lower edge accessed from inside the car and two just beneath the headrests accessed through sewn slits in the faux leather sling behind the seat back.
2) Remove the side panels by removing the fasteners along the bottom and rear (the speaker sections simply pull straight off and there are also two fasteners under them.)
3) Remove the rubber spoiler side sections - there is a bolt in the front part inside the car and a wingnut holding a cable on the rear accessible in the trunk on each side. There is a center stud that secures the center of the spoiler section which does not have a nut (at least on our car.)
4) Release the spring loaded cable on the lower front of the top canvas near the door jamb on each side. (Be careful not to let it retract past the exit hole!)
5) Remove the aluminum cover strip along the back edge of the top (just in front of the rear spoiler center section.)
5) Pull all the staples (there are lots of them) holding the top's lower perimeter along the sides and back.
6) Unplug the rear window defroster wire (drivers - port side) and disconnect the ground wire on the passenger side of the car.
7) Unsnap the tensioning straps (at the rear of the inside top near the window) on each side of the car.
8) Remove the hydraulic pistons by removing the securing plate accessed through a slot in the side of the support structure (2 bolts) and also removing the clevis pin at the piston shaft from the top frame pivot. Pull the hydraulic cylinders out of the way to protect them from damage.
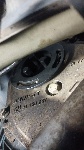
9) Remove the three nuts (and washers) which secure the convertible top frame on each side accessed through holes in the front of the support structure.
10) Push the frame back on each side of the car and lift out the entire assembly (two relatively strong people advised!) There may be sheet metal shims used to align the top between the frame and support structure. I am not sure how to determine their necessity so I simple re-installed the replacement top using them as I found them.
Re-installation is reverse of these steps.
The entire job takes around 3-5 hours including re-stapling the perimeter if you have the proper tools and the tack strips are re-usable.
Cheers!
posted by 99.75.88...
, Thu, 5 Jul 2012 12:08:01 <-- Viewing This Message
No Site Registration is Required to Post - Site Membership is optional (Member Features List), but helps to keep the site online
for all Saabers. If the site helps you, please consider helping the site by becoming a member.
 |
 |
 |
 |
 |