1994-2002 [Subscribe to Daily Digest] |
 Members do not see ads below this line. - Help Keep This Site Online - Signup
After posting a bunch of messages in response to questions about making your own preamp output cable, I have finally assembled some pictures and notes here to summarize a few key issues.
*Anyone wishing to build a preamp cable needs to read Richard Bevan�s Saab Audio Guide in the FAQ section of Saabnet. (See link below.) In addition to having lots of great info about upgrading your audio system, it has a diagram with the pin outs for the round 8-pin DIN preamp output jack on the Saab radio head unit.
* I have not been able to come up with a step-by-step instruction procedure for building a preamp cable, because there are too many variables: two channel or four channel amp; two channel going to front or to rear speakers; four channel with two separate two channel cables or a single four channel cable; etc.
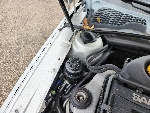
*To access the jack for the preamp output on the head unit, use Saab�s Stereo Removal Tools (part number 02-73-706, $16) to extract the head unit from the dash.
* Saab offers a couple of preamp output cables (part numbers 42-32-807 and 02-48-641), but they are pricey ($72-$88), and more importantly, they are specifically designed to connect the head unit to Saab�s own optional external power amp. (The external amp is optional for the base 9-3, and standard on the SE and Viggen.) The Saab amp uses a round 8-pin DIN jack for audio input, NOT the RCA jacks that are standard on virtually all aftermarket car audio amps. Therefore, if you intend to use any power amp other than Saab�s you will need to do some cable construction.
*Making a cable to connect the round 8-pin DIN preamp output on the radio head unit to the RCA input jacks of a power amp can be done in two generally ways:
1) Buy one of Saab�s preamp cables and cut it. Buy RCA interconnect cables, and cut them. Then solder all the wires together and insulate with electric tape or heat shrink tubing.
2) Buy an 8-pin DIN plug from Radio Shack (part number 274-026, $1.99). Buy RCA interconnect cables, and cut them. Then solder the wires to the connector. The pins in the Radio Shack connector have hollow ends in which to insert the wires, making the solder job a little easier than it would otherwise be.
If you have to solder a bunch of wires either way, you might as well buy the Radio Shack connector and save some money.
*The accompanying picture shows two different versions of do-it-yourself cables. Both of these are FOUR CHANNEL cables. The three photos on the left show a cable built with the Radio Shack plug and two conventional two-channel RCA interconnects. The three photos on the right show a cable built with the same Radio Shack plug, but with a single Monster MicroXLN interconnect cable. Monster Cable�s MicroXLN cables use extra-fine wires that allow the outer diameter of the cable to be much smaller than most other cables. They are available in both two-channel and four-channel types, in a variety of lengths. They are the only ones that I have ever seen that allow four channels to fit into a single wire with small enough diameter to fit out the hole at the back end of the Radio Shack connector. (Other similar cables might be available, but if they are, I haven�t seen them.) Because of the small diameter, the MicroXLN cables are also much easier to snake around everything else in the car when running wires from the head unit to the amp. Monster claims that they maintain the full audio fidelity of their own regular size cables. (By the way, I don�t have any particular interest in promoting Monster Cable, but these MicroXLNs really are the right cables for this job.)
*I generally recommend using the MicroXLN interconnect cables if you need to go out and buy cables to construct a preamp cable for your Saab. However, MicroXLNs are more expensive than many other interconnects, and if you already have other cables, you might as well use them. After all, saving some money is presumably why you don�t want to buy Saab�s expensive cable just to cut it up. The tiny wires inside the MicroXLN cables are also more difficult to strip and solder without damaging them. Whichever interconnect cables you use, make sure they are specifically shielded for automotive use. Cars have many sources of electrical noise, and if any of that noise gets into your preamp cable, it will be amplified right along with your music.
*As you can see by comparing the upper photos, the cable on the right is a cleaner construction.
In the conventional cables in the upper left photo, all four of the original cables are each constructed of a positive wire surrounded by braided negative wires acting as a shield. (This will become clearer once you cut open one of the cables.) After stripping off the insulation, all four of the negative wires are twisted together, but the combined bulk of those is too large to solder onto the single pin for Signal Ground on the plug. Instead, the combined negative wires are soldered onto the clamp-like portion of the outer metal jacket on half of the Radio Shack plug (shown at the top of that picture). When assembled and inserted into the jack on the radio head unit, that outer jacket contacts the metal exterior of the head unit, and is thus grounded. So in the cable construction on the left side, no wire is attached to the pin for Signal Ground. The positive wires are each soldered to the appropriate speaker pin according to the pin out diagram.
The original MicroXLN cables (right side photos) have the positives and negatives as separate insulated wires. The insulated wires are twisted pairs within the cable, which provides the shielding effect. In the upper right photo, the four negative wires (black insulation) are twisted together, and are still compact enough to solder to the single Signal Ground pin. In the middle right photo, the red item is heat shrink tubing that I added to act as additional strain relief to reduce the chance of the wires flexing too much and breaking off at solder point on the pins. The clear heat shrink tubing prevents the positive pins and wires from contacting the outer metal jacket of the plug (not shown) which becomes grounded when inserted into the radio head.
*Remember to slide the black outer jacket for the Radio Shack plug and any heat shrink tubing you might use onto the cable BEFORE you solder the wires to the plug pins.
*Many people, including myself, have been unable to get the Amp On pin in the preamp jack to activate their power amps. In theory, when you turn on the head unit, this pin should send a signal that tells the amp to power up. In my car (a 2000 9-3), I can confirm that a signal does come out of this pin at the right time, but it is apparently too low current to actually trip the amp switch. Therefore, I suggest tapping into the wire marked +15 on the radio head unit to signal the amp to turn on. (Pin outs for this wire are on top of the head unit when you extract it from the dash.) That wire gives positive 12 volts up to 15 amps whenever the car ignition is on. Do not use the wire for Antenna Trigger. In 9-3's, it is only on when the radio is playing, not when a CD is playing. Do not use the wire marked +30 (positive 12 volts at 30 amps). It is apparently the main power supply to the radio head unit. It is on even when the car is off, so using it would kill your battery by leaving the power amp on all the time.
*When you connect up the preamp output cable between the head unit and the amp, be sure to leave enough slack to allow you to later extract the head unit from the dash. After going to all the trouble to make and install a preamp cable, the last thing you want is to have the cable pop off the jack whenever you attempt to extract the head unit from the dash. It will be a real pain to get it back on.
*And lastly, even though it might seem complicated and difficult to build your own preamp output cable, you (yes, YOU!) are capable of doing it. If you screw it up, buy another Radio Shack connector, re-cut the cables, and try it again. This is not rocket science. It�s just a bunch of wires. So give it a try, and good luck.
SteveH
Richard Bevan's Saab Audio Guide

No Site Registration is Required to Post - Site Membership is optional (Member Features List), but helps to keep the site online
for all Saabers. If the site helps you, please consider helping the site by becoming a member.
 |
 |
 |
 |
 |