1964-1974 [Subscribe to Daily Digest] |
 | [Main Sonett Bulletin Board | BBFAQ |
Prev by Date | Next by Date | Post Followup ]
Member Login / Signup - Members see fewer ads. - Latest Member Gallery Photos
Re: Sagging Headliner... Posted by Paul Z [Email]  (#481) [Profile/Gallery]
(more from Paul Z) on Sat, 4 Apr 2009 12:37:29 (#481) [Profile/Gallery]
(more from Paul Z) on Sat, 4 Apr 2009 12:37:29

In Reply to: Sagging Headliner..., Sue Esponte, Thu, 2 Apr 2009 20:41:11 Members do not see ads below this line. - Help Keep This Site Online - Signup |
Hi Sue. I replaced the headliner in my 71 Sonett III. In addition to removing the roll bar you must also remove the rear-view mirror with the sun visors, and the trim strips above the doors. When I did mine, the windshield and rear hatch gaskets had also been removed making the job much easier. If you do not remove the windshield & rear hatch gaskets, you have to tuck the headliner underneath the rubber, and I strongly suggest not using anything sharp (a plastic spatula typically used to apply body filler works good) and you must be very careful or you will tear the headliner. Removing the roll bar requires removing the rear hatch latches anyway, because the roll bar is screwed to the hatch hinges, so you might just go ahead and remove the rubber strip too.
If you take a good look, you will see that the headliner strips (which run on both sides of the hatch) are sewen to the larger piece of headliner that covers the passenger compartment. Last I knew, Jack got $350 for his headliner kit. For about $35 you can get the same material from your local fabric shop and sew those strips on yourself. Jack's kit also includes some vinyl pieces for the windshield pillers and new trim panels for above the doors, however if your trim panels are still in good condition, you can find a suitable vinyl locally and cut them yourself as needed. There is no vinyl to spare in Jack's kit and I found that had to buy more locally to get the job done.
The most difficult part of the job was glueing those two strips on either side of the hatch because of the upwardly curved surface. Once the headliner touches the adhesive, it STICKS, so you can envision trying to get the headliner up inside the curve without it touching the sides first!!! Other than those two areas, it was easy enough to fit it in place. I did not find it necessary to use a roller, but it may help. The correct way to install a headliner is to spray a 6" strip of adhesive down the center of the ceiling (front to back) and fit the headliner (properly centered) to that strip. Then do each side one at a time, working your way out towards the doors.
If your exising headliner is drooping on a spot or two, it might be easier to tack it back up with a spray adhesive (I recommend a high quality 3M brand or like). The trick to getting it to stay up IS TO CLEAN THE FIBERGLASS! I used an 80 to 100 grit sandpaper and hand sanded the old adhesive off, then cleaned it further with Acetone and a rag. This is absolutely neccessary whether patching a small area or doing the whole thing. I probably spend a good eight hours or more just cleaning it.
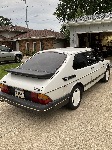
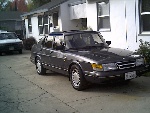
I have some pictures posted of my interior in my photo gallery in the album titled Interior.
My 71 Sonett project finished 2008
, Sat, 4 Apr 2009 12:37:29 <-- Viewing This Message, Fri, 3 Apr 2009 05:35:41
No Site Registration is Required to Post - Site Membership is optional (Member Features List), but helps to keep the site online
for all Saabers. If the site helps you, please consider helping the site by becoming a member.
 |
 |
 |
 |
 |