2003-2011 [Subscribe to Daily Digest] |
 | [Main 93 Bulletin Board | BBFAQ |
Prev by Date | Next by Date | Post Followup ]
Member Login / Signup - Members see fewer ads. - Latest Member Gallery Photos
Subframe replacement completed! Posted by Pete [Email]  (#2000) [Profile/Gallery]
(more from Pete) on Tue, 19 Mar 2019 15:50:45 (#2000) [Profile/Gallery]
(more from Pete) on Tue, 19 Mar 2019 15:50:45
 Members do not see ads below this line. - Help Keep This Site Online - Signup
|
Finally got around to swopping out the subframe. Took 10 hours, including new rear brake disks, pads and front lower suspension arms.
Biggest hurdles? One of the three bolts holding the top of the shocks in place would not come out, as the nut broke free its spot weld, so it just spun. Had to drill a couple of holes around the bolt, and mig weld the nut in place. (Thankfully in-house mechanic did that!)
Removing the subframe was straight forward. Next time though, would support the outer lower control arm with a Jack, then remove the outer bolt, lower the Jack, relieving the tension on the spring, then remove the 4 mounting bolts. When fitting subframe, leave outer lower control arm still disconnected, mount the subframe, attach the outer lower control arm bolt, then Jack up the wheel hub assembly to attach the shock.
Left the exhaust attached, lying on the floor at the back of the car while car was elevated a couple of feet - enough space to drag the old subframe out, and put the new one in.
Always slow the first time doing a job. Could probably do it faster next time.
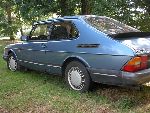
So the results? OMG! Drives like a new car! And still need an alignment done!
Honestly though, next time I'd probably just pull off all the control arms and hub, replace them all and reattach to the subframe. Unless you live in the rust belt, the subframe would do just fine without a repaint.
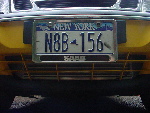
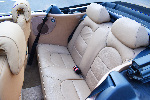
Couple of pics uploaded to my profile.
, Tue, 19 Mar 2019 15:50:45 <-- Viewing This Message
No Site Registration is Required to Post - Site Membership is optional (Member Features List), but helps to keep the site online
for all Saabers. If the site helps you, please consider helping the site by becoming a member.
 |
 |
 |
 |
 |