1999-2009 [Subscribe to Daily Digest] |
 Members do not see ads below this line. - Help Keep This Site Online - Signup
Keywords: CPS crankshaft position sensor DIY drs_install
There are a few good postings on this subject so I will not go into much detail. Mostly just highlights that might be model-year specific.
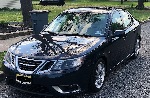
2003 Aero Wagon 91,000 miles, automatic transmission
After a 900 mile drive, got off of the 75mpg I70 in Kansas and then was stopped at a red light. Engine stumbled badly when accelerating after that. It was a bit over 100F. Another hot day, drove, stopped somewhere for a bit then stumbling after that. Seemed to fit the profile of CPS failing from heat+time. Other times drove fine in cooler weather. I have have had a new CPS on-hand for a few years.
I did remove the heat shield and bypass valve pipe. Did not need to remove the battery. Battery was relocated at in 2002 I think. So that might explain that. Did remove battery cover.
I could not remove the CPS #30 Torx screw from above. In models where there are two catalytic converters, there is a cat right opposite the CPS that simply makes working from above quite awkward. If the torx screw had had a deeper torx cavity, the job would have been simple.
So I jacked up the driver's side of the vehicle. [Other posts suggests the right side of the vehicle, which is misleading.]
From below and from the center of the vehicle, one can see the CPS and some of the screw which remains partly obscured by the CPS's small heat shield. But there are two brackets/stays that secure the turbo and downpipe/cat to the engine block. [The bolt that secures the stays to the block was missing in action.] So I removed the stays which was very easy. [4 13mm hex head bolts, M8 16mm.] I obtained a bolt and washer from Ace Hardware to set things right.
With the stays removed, getting the screw out was quite easy, it was not rusted in.
So the cat is still in the way and getting the old CPS [and o-ring] out was not easy, I got a robo wrench on it and when there was a gap also got a long screw driver on it and eventually it was removed.
I was able to reach the clip that secures the CPS wire to the coolant hard pipe to remove and replace. I cut a zip tie that bound to coolant hoses an a wire bundle together and pulled the rad hose up and towards the head to allow my hand to get in there. Replaced zip tie afterwards.
I routed the wire connector in place with a flexible cable claw.
When installing the new CPS sensor head the cat is still in the way. So suggestions of using a wooden block to drive it in did not make any sense. I did use a punch/nail-set to ensure alignment of the mounting hole. To press the sensor in place: I put some lithium grease on the senor and its o-ring. Found a large extension socket that mostly filled the gap from the sensor to the cat converter then with a large screwdriver, pried against the cat convert to press the sensor and socket towards the block.
The sensor may go in easier if the lubricated o-ring is placed in the block then the sensor carefully inserted into that.
Getting the CPS heat shield and screw in place was a but fussy. The alignment was OK, but perhaps off enough to make getting the thread started less that easy.
I put aluminum never seize on all threaded fasteners.
Problem solved? Too soon to tell.
posted by 108.207.11...
No Site Registration is Required to Post - Site Membership is optional (Member Features List), but helps to keep the site online
for all Saabers. If the site helps you, please consider helping the site by becoming a member.
 |
 |
 |
 |
 |