1979-1993 & 94 Conv [Subscribe to Daily Digest] |

Thanks to all for the great advice. I finished the job yesterday afternoon and will provide a summary for future references. All in all not a bad job but more than the 2 hours I thought it would take. For reference, this is on a 91 900 NA and I got 4 Boge’s from Sobstory for $41 each. First time the shocks are replaced on the car after 165k.
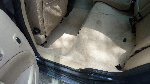
Rear: Bolts came off pretty easily and there is no access problem. As I stated, I had a hard time getting the old shock out. I ended up using a 5” long piece of wood that I pushed through the bottom of the trailing arm with a small jack. Once the shock was compressed, it was easy to move the bottom to the side over the parking brake cable and remove the top. Installation was the same as removal. Inserted the top and compressed the bottom with a small jack. Once it was compressed, moved it over the cable in position. Then the fun started trying to get the bottom of the shock in the correct position. The bottom of the shock has some teeth on the metal bushing and those were the main reason why the removal by hand was so difficult. I used a small pry bar to tap (read “hammer”) the bushing in the correct position while supporting the bottom of the arm with a jack. Also, do this first and then move the trailing arm up (with a small jack again) to get the top in the right position so you can attach the top.
WARNING: In my misguided search for more clearance to remove the shock, I loosened the top of the shock on both sides at the same time. In the middle of installation, I realized that the flexible rubber brake line connection between the chassis and the axle was the one limiting any further movement down of the axle. If I had torn that line, my job would have been a lot longer. So make sure you stick to one side at a time.
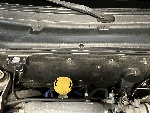
Front: The front was actually very easy after that. Lower bolt is easy to get to and the top is a little tight. The car came with 2 16mm nuts on top. I used a small adjustable wrench to hold the flat part of the shaft and then a box end wrench to loosen the top one. After that I could remove the first nut by hand (advantage of a California car and this is without any penetrating oil). Same for the second nut. Using a bit of Vaseline for the bottom rubber bushing was great advice from the Bentley. Then I lowered the car until the shocks were in the right position on top. The new shocks came with a single 17mm nut with the nylon lock. Was difficult to do by hand and the shaft was turning if you used a socket. So I used an impact wrench and was done in 30 seconds. If I didn’t have access to an impact wrench, I guess I could have used one of these ratcheting box end wrenches while holding the shaft with an adjustable wrench.
I did not have a chance to drive the car yet but I’m sure the difference is going to be great. Especially now I got some new Michelins from Costco in their recent sale ($412 for MXV4+ 195R60 out of the door). I’m expecting some more parts to come in from Jim so I can do my front motor mount and radiator at the same time and then I’m going to replace the ball joints and right inner drive. It should drive like a new car again.
posted by 167.83.1...
 , Sun, 8 Feb 2004 12:37:29
No Site Registration is Required to Post - Site Membership is optional (Member Features List), but helps to keep the site online
for all Saabers. If the site helps you, please consider helping the site by becoming a member.
 |
 |
 |
 |
 |