1979-1993 & 94 Conv [Subscribe to Daily Digest] |
 | [Main C900 Bulletin Board | BBFAQ |
Prev by Date | Next by Date | Post Followup ]
Member Login / Signup - Members see fewer ads. - Latest Member Gallery Photos
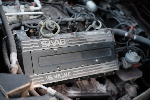
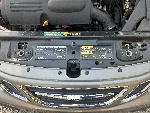
Jefff's DIY De-AC procedure! Posted by Saana88 [Email]  (#207) (#207)  [Profile/Gallery]
(more from Saana88) on Fri, 24 Feb 2006 16:34:59 [Profile/Gallery]
(more from Saana88) on Fri, 24 Feb 2006 16:34:59

In Reply to: AC Removal Issues?, House, Fri, 24 Feb 2006 10:13:22 Members do not see ads below this line. - Help Keep This Site Online - Signup |
, Fri, 24 Feb 2006 16:34:59 <-- Viewing This Message, Sat, 25 Feb 2006 21:17:02 , Fri, 24 Feb 2006 11:51:30, Fri, 24 Feb 2006 16:36:46
No Site Registration is Required to Post - Site Membership is optional (Member Features List), but helps to keep the site online
for all Saabers. If the site helps you, please consider helping the site by becoming a member.
 |
 |
 |
 |
 |