1985-1998 [Subscribe to Daily Digest] |
 | [Main 9000 Bulletin Board | BBFAQ |
Prev by Date | Next by Date | Post Followup ]
Member Login / Signup - Members see fewer ads. - Latest Member Gallery Photos
Look at the check valve. Posted by sam96CS [Email]  (#852) [Profile/Gallery]
(more from sam96CS) on Sun, 16 Aug 2009 18:46:27 (#852) [Profile/Gallery]
(more from sam96CS) on Sun, 16 Aug 2009 18:46:27

In Reply to: REAR WASHER TANK?, DAO, Sun, 16 Aug 2009 15:17:07 Members do not see ads below this line. - Help Keep This Site Online - Signup |
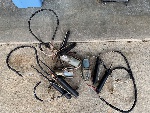
If you remove the lens from the elevated brake light (two torx screws secure it) you'll find a little 2-way check valve, part number 5142757. Replacing ($10 or less) or repairing this part will probably make your rear washer work. To check, remove the check valve, operate the rear washer and see if washer fluid squirts out. If washer fluid doesn't squirt out (and you know there's fluid in the reservoir), then you'll have to backtrack. The problem could be with the hose, a hose connection, the rear washer motor or with another check valve that is located near the reservoir.
If you repair the part, then you can choose a diaphragm material that should hold up well with the solvent in your washer fluid (the fluid label will identify the solvent). For example, use viton, butyl or nitrile if your solvent is methanol (methyl alcohol).
Here is my version of the repair procedure, and you can find other comments about repairing the check valve if you use the search window above.
REPAIR PROCEDURE:
1. The check valve has a round cap with a small hole in the middle of it. With a magnifying glass you can see the seam between the cap and the body of the valve. Force the point of a pocket knife into the seam and wiggle the knife to pop the cap off - it is press fitted.
2. Scrape out the doughnut-shaped remnant of the old dried-up diaphragm with a small standard screwdriver or jeweler's screwdriver. Use a paperclip to ream out the little hole if it is obstructed. The plug (piston) in the center of the cap (which has the little hole through it) should be loose fitting and springy because of the little spring that's behind it. If it's not loose, then keep scraping and prying until you work it loose. Or push it out by inserting a paperclip wire through the hole at the outside end of the cap. This plug is a spring-driven piston that shuts off the valve to prevent the fluid from draining back to the washer reservoir. Scrape clean this inner plug and the inside of the cap where the plug fits.
3. With scissors cut a circular piece of rubber from a latex glove and fit the piece into the body of the check valve. Press on the cap. The check valve should be as good as new, if not better.
, Sun, 16 Aug 2009 18:46:27 <-- Viewing This Message
No Site Registration is Required to Post - Site Membership is optional (Member Features List), but helps to keep the site online
for all Saabers. If the site helps you, please consider helping the site by becoming a member.
 |
 |
 |
 |
 |