1969-1984 [Subscribe to Daily Digest] |
 1 Saabers Like This Post!
 Members do not see ads below this line. - Help Keep This Site Online - Signup
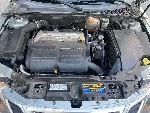
I just had the steering rack on my 1977 99 EMS rebuilt using a bronze guide bushing that I made myself. Making the bush was tedious but not too difficult. The guide bushing is the nylon piece that sits inside the rack housing at the passenger side of the car and holds the toothed rack bar steady in the middle of the housing. Its been NLA for years. Luckily everything else on my rack was OK
I opted for bronze after wasting weeks searching for the Saab nylon bushing or an equivalent part from another car. For the record, the 99s manual racks all seem to have been made by Cam Gears [later bought by TRW] in the UK. Cam made some of the Volvo 240 manual racks and also racks for various european Fords that later found there way onto exotica like the De Tomaso Pantera. I had great hopes of finding a readily available interchange part but got nowhere. What I did find was that there were bronze bushings available for several other applications of the Cam Gears rack since the nylon guide bush seems to be the weak link in all of them. Unfortunately non of the off the shelf bronze bushes would fit the Saab rack.
This link shows my bush http://s1082.photobucket.com/albums/j361/Sabcit/ The bush mimics the shape of the nylon original, which I assume was designed to let the oil move past the bushing. To hold the bush in place it uses a set screw tapped into the bush and fitted through one of the holes in the rack housing where the 'ears' of the nylon original fitted.
I started with a plain bronze sleeve bearing with a 1 inch ID X 1 3/8 OD and 1 1/4 long. [Bunting Bearings CB162210 which is available on Amazon]. I couldn't find out if the rack was based on imperial or metric dimensions but measuring the bar on a spare rack I got 24.95mm or 0.98 ins so I went with a 1 inch ID since imperial bushes are easier to get in the US. That ID is a close but not overtight fit on the rack bar. The nylon original is about an inch long and the housing would take a bush over 2 inches long but I opted for 11/4 ins to give plenty of support without making it too difficult to shape the bush. The 1 3/8 OD is slightly oversize and the tedious part is reducing the diameter evenly till its fits snuggly into the housing. I don't have a lathe so my hand method was first to produce the 3 flats at 2, 6 & 10 o'clock with an angle grinder then to coat the remaining surfaces with black ink, file off the ink by hand, test fit and repeat again & again & again. [I did say it was tedious!].
The set screw is a M4 0.7 thread that is just oversize for the existing holes in the housing so you can tap the thread into the housing to get a good fit. A 6mm length of screw is about right to fit into the bushing without fouling either the rack bar on the inside or the bellows on the outside. Remember to use red Loctite to fix the set screw in place when you assemble the rack.
Jack Baxter at S&J in Atlanta who rebuilt my rack seemed happy with this bushing & it should last a lot longer than the nylon original. BTW Jack also found one other trick when he was hunting for a piece of 4mm rod to stake in the lock screw on the ball & cup joints - a small steel pop rivet works perfectly.
I did look at remaking the small nylon cups for the ball & cup joints in bronze but thats not a DIY job and my local machine shop would need to make a run of 100 to get the cost down to $20 each [$40 per rack].
Hope this helps anyone else needing a rack rebuild
Terry
posted by 72.152.242...
 1
1
No Site Registration is Required to Post - Site Membership is optional (Member Features List), but helps to keep the site online
for all Saabers. If the site helps you, please consider helping the site by becoming a member.
 |
 |
 |
 |
 |