1985-1998 [Subscribe to Daily Digest] |

Hi Soneway,
Thanks for your kind reaction.
The setup I am using is driven by the fact that:
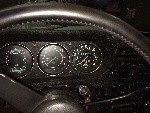
1. My car came with a dashmount (near the top of the dash between the center vent and the airbag)
2. I wanted both a good handsfree telephone set and satnav;
3. I did NOT want a second dashmount.
For my 9-3SS I selected the Parrot Ck3000 to be built in. Since it worked really neat I decided to put it in the 9k as well. I see this kit mentioned on the 9-5 BB regularly, so I'm quite sure it is available in the US. the only drawback of not having a cradle/ dashmount is that the phone battery does not load during driving. OTOH that's much better for battery life.
The kit is basically a small black box with two wiring harnesses, a microphone and a very small pad with two buttons (red and green). It operates on bluetooth, so any phone equipped with that works with it.
The box I put in the bottom of the center console behind the big cubby hole. The microphone I routed behind the driver side kick panel, through the a-pillar to the switchpanel at the sunroof. It is very small and just clamps under the console. No wires to be seen.
The switchpad: I drilled a small hole in the backside of the big cubby hole and took the wire through. the pad sits on the bottom of the box, but I can put it somewhere else if I want to as the wire is quite long. I do not use the pad often anyway, as incoming calls are answered automatically. For outgoing calls I would have to push the green button and shout for the person I want to call.
That was the easy part. It gets a bit harder from here on.
The radio is connected by two wiring harnesses: One carrying the power and auxilary stuff, one providing the output to the speakers. The easiest one is the power plug, as it physically fits the DIN plug that comes with the kit. Just plug it in, but in my case the continous and switched 12v leads were swapped so the radio was always-on. Easy again: the kit comes with in-wire fuses in both leads. Just unscrew both fuses, swap one end and put it back on. Presto!
The mute facility is also on this plug: There is a wire sticking out of the plug that you have to connect to one of the 3 'flavors' of mute wire that the harness comes with. In my case it was cable #1. Just try out but on the Clarion headunit it will probably be consistent for all markets.
Remains: the harness to be connected to the speakers. If you have an additional amp under the passenger seat, leave the harness on the headunit alone!!! If your speakers connect directly to the headunit, you need to splice into it, because the wire arrangement is different from DIN standard. Basically the setup on the Saab plug is 'rotated' by 90 degrees compared to standard, with the + and - of one speaker next to one another over the long side of the plug, instead of opposite to one another over the short side. Straightforward once you see it. But the color coding can differ between years and market model/ trim so some research might be necessary for your car.
If you have the amp under the passenger seat, I would advice you to splice into the speaker wires of the front speakers, like I did. I run two pairs of wires to and from each speaker, under the kickpanel and then up. I just took out the 'bass' speaker, the tweeter is routed via this speaker as well. I cut the wire coming from the amp and soldered my improvosed harness on, effectively bringing the carkit 'in the loop' as it is supposed to be.
It is not hard to do, all of this, just takes quite some time.
The satnav was a breeze compared to this. I use an Ipaq 2210 PPC running Windows CE with TomTom Navigator software. It comes with a cradle that fits like a glove, so no ugly 'clamshell' setup here. The cradle neatly fitted the existing dashmount, and since the previous owner had the crazy idea to drill a hole in the dash right under the mount, the 2 cables go right into the center console:
1. power cable: soldered to the cigarette ligther connection.
2. antenna cable: down into the center console, behind the fuse/ relaybox at the passenger feet and then up to the corner in front of the right hand speaker. The antenna itself is a small box (1 square inch) and should be situated with a clear view up, so there really is no other option than right under the windshield(under the moonroof, perhaps?? :-)).
That is basically it. If you want I can try to post some pictures.
regards, Jan Geert
posted by 145.7.18...
No Site Registration is Required to Post - Site Membership is optional (Member Features List), but helps to keep the site online
for all Saabers. If the site helps you, please consider helping the site by becoming a member.
 |
 |
 |
 |
 |