1994-2002 [Subscribe to Daily Digest] |
 Members do not see ads below this line. - Help Keep This Site Online - Signup
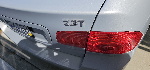
My car is 2000 Viggen with around 80k miles which USED to have a busted strut mount = very annoying loud clunk and rattle. I replaced the strut mounts and changed all the bushing on the control arm to urethane from GS. The original bushings were pretty worn. One side was completey shot. The ride is better with the urethane bushings! I also installed steering rack/brace from GS.
First of all, thanks to dip's excellent site which basically motivated me to do this difficult DIY. I'll include the link to his site at the end. Also, thanks to all of you who wrote about this subject and Anders for quick reply for technical questions. I never imagined I could've taken the whole front suspension apart myself. It took a whille and had been difficult at times but after driving with the firmed up suspension and things I learned, it was all worth it.
Some tips:
1. Get right tools. Dip in his site shows using a pitman arm puller to push out the ball joint and the tie rod end. Its arms are fixed but very sturdy. A gear puller looks more versatile since the arms (jaws) can be adjusted. One thing one needs to know though is that not all gear pullers are created equal. I got two gear pullers from JCWhitney (4" and 8") for a little more than twenty dollars. Sounds cheap but the quality is really cheap as well and that can be a serious problem. These pullers has to withstand a big force, but both of those Chinese made pullers couldn't handle the very job it's supposed to do. The links on the arms would bend and even the big one couldn't even budge one of the tie rod ends since they kept tilting when pressed. Luckily a nearby auto shop carried a 4" real gear puller made by Lisle in USA for about $30. Very thick arm links and didn't bend at all under pressure. It pushed the tie rod end in the first try, but unfortunately after unsuccessful attempt using multiple hammers by three people also making the tie rod end useless. I had to wait a couple days for the new tie rod end to finish. So pay more for good tools that work first time.
2. For people who have Bilstein strut inserts installed. It's a big pain is the arse to loosen the top nut on the strut. I guess 9-3's have different strut mount set up from NG900's. For this dip's instruction didn't work since the nut is so recessed in the strut mount. Furthermore, the Bilstein inserts have hex indent for allen key at the end of the stud. The only way I found was using a long socket without a wrench and a way to turn that socket at the same time holding the stud with an allen key. The socket I have has a little hole on one side where I could insert a allen key to turn. In any case it didn't work well. However a good impact wrench works like a dream even without holding the stud. I suggest loosening those nuts (but don't take out) before starting this DIY at a nearest mechanic with an impact wrench, and take back to tighten at the end. Forget about the spec torque. There's no way of using a torque wrench.
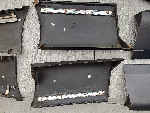
3. About the strut mount. The Corteco brand I got from Eeuroparts appeared exactly same to the OEM strut mount down to the smallest markings. I did some research perusing many pictures online before buying and I believe they are the same mounts and used to be the supplier. And they are cheaper!!
4. Handling the strut assembly with the rotor cover attached can bend it easily. Make sure to straighten them out before assembling with a hammer and a large plier. Hitting at the right places can quickly fix this.
5. Be careful with the ABS sensor when taking it off. Unlike NG900's, 9-3's use a 10mm bolt for the sensor and 5mm hex key for the bracket. On 9-3's taking off the sensor not the bracket is safer. One end of the braket is being held by a plastic pin that can easily break when pulling out. The sensor is over $100. Guess how I know.
6. When attaching the tie rod end, a long clamp like the one dip used is necessary to exert more pressure with leverage by pulling one end of the clamp.
Conclusion: For me it took way more than a day since I had to wait for a part. But, if you are doing this first time, heed people's advices and get all the tools ready, and I believe one could do this in one day. Not an easy DIY, very involving, but you can learn a lot about the notorious front suspension of 9-3's. The confidence I got from knowing what's going on down there was absolutely worth it and I recommend this DIY if you have time and a flat space to work on.
Thanks again Saabnet for a great community.
borami
'00 Viggen
posted by 70.23.52...
No Site Registration is Required to Post - Site Membership is optional (Member Features List), but helps to keep the site online
for all Saabers. If the site helps you, please consider helping the site by becoming a member.
 |
 |
 |
 |
 |