1994-2002 [Subscribe to Daily Digest] |

Shortly after my previous post, I went ahead and replaced the shear pin. I had to drill out the old one, which was a bit of a challenge. I detached the hydraulic assembly from the chassis so I could get a better angle on it, but it should be possible to drill out the shear pin without disassembling anything. It would just be very important to make sure the drive hinge shaft was in the correct orientation, with the parts of the shear pin lined up correctly.
After taking the hydraulic assembly off its mounts (I did not attempt to fully disconnect it from the car), I seperated the shaft of the drive hinge from the universal joint (which took a lot of WD-40 and elbow grease--the sheared pin caused significant resistance), to make sure I didn't drill through the shaft in the wrong place. Again, it should be possible to drill out the shear pin without doing this, as long as the drive hinge shaft is oriented correctly.
I actually ended up replacing the shear pin with a roll pin I got from Home Depot for cheap, which was nearly the same size (I forget exactly what size, I think it was 5/32" x 1"). Note: this is not adviseable, because the shear pin serves a very important purpose by shearing at a specific torque, preventing damage to the very expensive hydraulic motor and assembly. Do yourself a favor and order an official replacement shear pin in advance. You can find it here: http://www.thesaabsite.com/93/93convertibleparts.htm, it labelled #8 in the first diagram, and is part number 5184098 (I think). I found it easiest to hammer in the roll pin by fully reinstalling the hydraulic assembly in the car, and bracing the u-joint.
The Home Depot stainless steel roll pin I used has lasted several months without any problem, but since it may likely be *stronger* than the shear pin, I risk damaging the hydraulic assembly if something accidentally jams the convertible top again during operation.
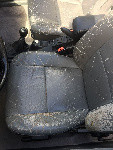
Here are some photos I took of the assembly while I was working on it:
http://fotologue.jp/pseudothink#/3386705/3386777
http://fotologue.jp/pseudothink#/3386705/3386784
In the above pictures, the blue arrow indicates the hydraulic piston, which I had to reposition in order to access some screws, and to orient the shaft correctly with respect to the u-joint. The green arrow points to a tape marker I put on the shaft, to show how it is moved by the hydraulic piston. The red arrow points to the u-joint set screw, which was missing entirely on mine. It doesn't seem to be needed, given the movement constraints of the assembly.
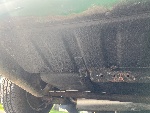
http://fotologue.jp/pseudothink#/3386705/3386785
In this picture, the red arrow points to the shear pin, before I drilled it out.
You can easily access the hydraulic assembly by pulling back the trunk compartment lining on the upper right side. You may have to unscrew a part of the trunk that holds the lining in place, in order to have full access to the assembly, like I did.
posted by 68.101.161...
 , Tue, 27 Mar 2007 19:21:34, Tue, 27 Mar 2007 18:38:39
No Site Registration is Required to Post - Site Membership is optional (Member Features List), but helps to keep the site online
for all Saabers. If the site helps you, please consider helping the site by becoming a member.
 |
 |
 |
 |
 |